How to Export a Press-Ready PDF for Offset and Digital Press (with G7 Compliance)
Exporting a press-ready PDF can feel trickier than it should—this guide makes it simple.
Introduction
Goal: make creating a press-ready PDF fast, consistent, and G7-aligned—without guesswork. This page provides ready-to-use .joboptions files and direct links to official GRACoL 2013 ICC profiles for coated and uncoated papers. Import once, export correctly every time.
What matters most: start with sufficiently high-resolution images, keep placed photos RGB until export (except locked-in brand CMYK builds), choose the correct GRACoL profile, add bleed, and embed fonts. Printing Partners runs higher line screens on offset and 1200 dpi on digital; the presets below exploit that capability.
Download first: GRACoL 2013 ICC profiles
Installing GRACoL ICC Profiles on macOS
On macOS:
1. Download the GRACoL ICC profile.
2. Copy the file into /Library/ColorSync/Profiles (for all users) or ~/Library/ColorSync/Profiles (for just your account).
3. Restart Adobe apps. The new profile will appear in InDesign, Illustrator, and Photoshop under Color Settings and Output Intents.
Installing GRACoL ICC Profiles on Windows
On Windows:
1. Download the GRACoL ICC profile.
2. Right-click the file and choose Install Profile, or copy it to C:\Windows\System32\spool\drivers\color.
3. Restart Adobe apps. The profile will now be available in Color Settings and export options.
Troubleshooting Tip
Tip: If you don’t see the profile after installation, double-check that your design software was restarted. Adobe apps only load color profiles on launch.
Then install our Adobe PDF presets (.joboptions)
Install in InDesign (Mac + Windows)
1. Download the .joboptions file.
2. Open InDesign.
3. Go to File > Adobe PDF Presets > Define.
4. Click Load, select the .joboptions file, then click Done.
5. You’ll now see the new preset as an option when exporting to PDF.
Install in Illustrator (Mac + Windows)
1. Download the .joboptions file.
2. Open Illustrator.
3. Go to Edit > Adobe PDF Presets.
4. In the panel, click Import, choose the .joboptions file, then click Done.
5. The preset will now appear in the PDF save/export dialog.
Install in Photoshop
Photoshop doesn’t use .joboptions the same way. Instead, presets are applied at File > Save As > Photoshop PDF. When that dialog appears, you’ll see the imported presets available under the Adobe PDF Preset dropdown — they’re shared from the system folder once you’ve loaded them in InDesign or Illustrator.
If they don’t show up, copy the .joboptions files into your system’s Adobe PDF presets folder:
– macOS: /Library/Application Support/Adobe/Adobe PDF/Settings
– Windows: C:\Users\[YourName]\AppData\Roaming\Adobe\Adobe PDF\Settings
Then restart Photoshop.
Key settings explained
Resolution
Resolution – Preset caps image resolution at 400 dpi. This does not “fix” a low-res image. A 72 dpi photo is still 72 dpi sadness.
Color
Color – Keep photos in RGB until export. Adobe’s PDF engine does the best conversion. Exception: logos or corporate brand colors that must hit exact CMYK builds.
Profiles
Bleeds & crops
Why Printing Partners’ settings are different?
Why are Printing Partners’ PDF settings are different?
Higher DPI Than Industry Standard
Common pitfalls we see:
- Effective DPI: It’s not just the number in Photoshop. A 300 dpi photo placed at 400% size is really only 75 dpi on the page—soft and fuzzy in print. Always check the effective resolution in InDesign’s Links panel.
- Fuzzy text: Live text or vector art will always print razor-sharp. Small type flattened in Photoshop becomes pixels, and those pixels will never look as crisp as real text.
- Fonts: Free “personal use only” fonts from the web are one of our biggest headaches. If you get a font error during PDF export, we’ll see the same problem when processing your file. Stick to properly licensed fonts to avoid missing characters or forced substitutions.
- Bleed: Still one of the most common mistakes. Always add 0.125″ bleed so color and images extend past the trim edge.
Ready to test it?
Download a preset, run your export, and check the PDF in Acrobat. Zoom way in. Look for crisp type, sharp images, and crop/bleed marks. If something looks fuzzy there, it will look fuzzy on press. Questions? Contact us—even if you’re printing elsewhere, we’d rather you get it right.
Heads up:
Adobe’s default “High Quality Print” preset just passes RGB images through and caps resolution at 300 dpi. It’ll work, but it’s not truly press-ready. Our presets convert correctly and push resolution to 400 ppi for sharper, more accurate print.
Don’t Let a Bad Fold Ruin a Good PDF
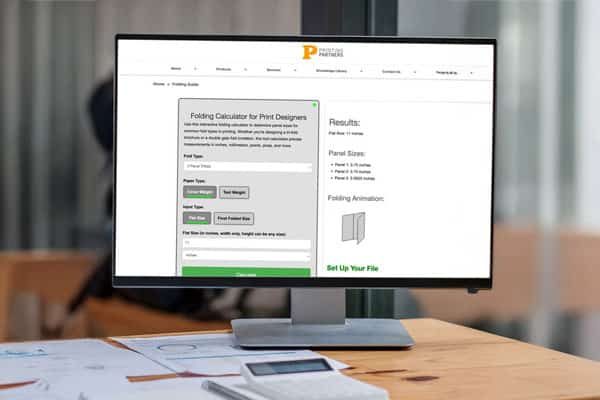
Folding layouts can be tricky — our calculator makes it easy. Quickly figure out panel sizes and fold styles like tri-fold, Z-fold, or gatefold so your design lines up correctly and prints without surprises.

Coated or Uncoated? Find Out Here
Discover the differences between coated, uncoated, matte, and gloss paper stocks. Learn how paper weight and finish affect the look, feel, and durability of your printed piece so you can choose the right option for brochures, books, or marketing materials.

Binding Types
From saddle stitch to perfect bound and Wire-O, each binding style creates a different look and level of durability. Explore which binding method best suits your booklet, catalog, or publication so your project is both functional and professional.