How to Create Die Files for Commercial Printing
When Printing Partners helps clients with creating die files, we focus on accuracy, clean vector construction, and clearly separated processes (cutting vs. foil/emboss). Use this guide to prepare production-ready dielines that run smoothly on press and finishing.
What Is a Die File?
A die file is the vector “map” that tells finishing equipment where to cut, score, foil stamp, or emboss. It sits alongside your print artwork and must be precise, on a separate layer, and built with spot colors so every operation registers perfectly.
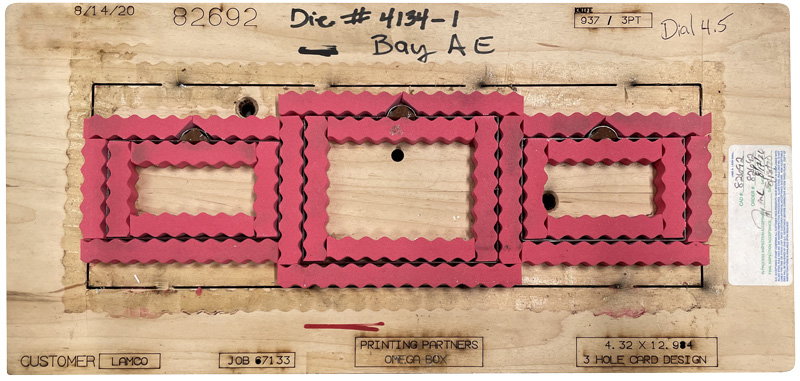
Note: The photo below is an actual cutting die used at Printing Partners. The red foam areas act as cushions that hold the paper in place during cutting. When pressure is applied, the raised steel knives press through the sheet and cut it precisely to the shape of the die.
Cutting vs. Foil/Emboss: Why Separate Files (and Layers) Matter
Cutting and creasing affect the shape and folding behavior; foil stamping and embossing add visual and tactile effects. Keeping each process on its own layer (and, when requested, separate PDFs) avoids registration conflicts and makes prepress checks faster.

Types of Dies and Their Uses
| Die Type | What It Does | Typical Uses |
|---|---|---|
| Cutting Die | Cuts through the sheet to create custom shapes. | Folders, shaped cards, boxes, hang tags. |
| Scoring/Creasing Die | Creates fold lines so thicker stocks fold cleanly. | Cartons, folded collateral (see our Folding Guide). |
| Perforating Die | Adds tear-off or coupon lines without full cuts. | Reply cards, coupons, tickets. |
| Embossing/ Debossing Die | Raises (emboss) or recesses (deboss) the paper surface. | Luxury packaging, stationery, premium covers (learn more). |
| Foil Stamping Die | Transfers metallic or pigmented foil under heat/pressure. | Logos, borders, specialty accents (foil options). |
| Combination Die | Emboss + foil in one pass for sculpted, high-relief effects. | Premium branding marks on custom packaging. |
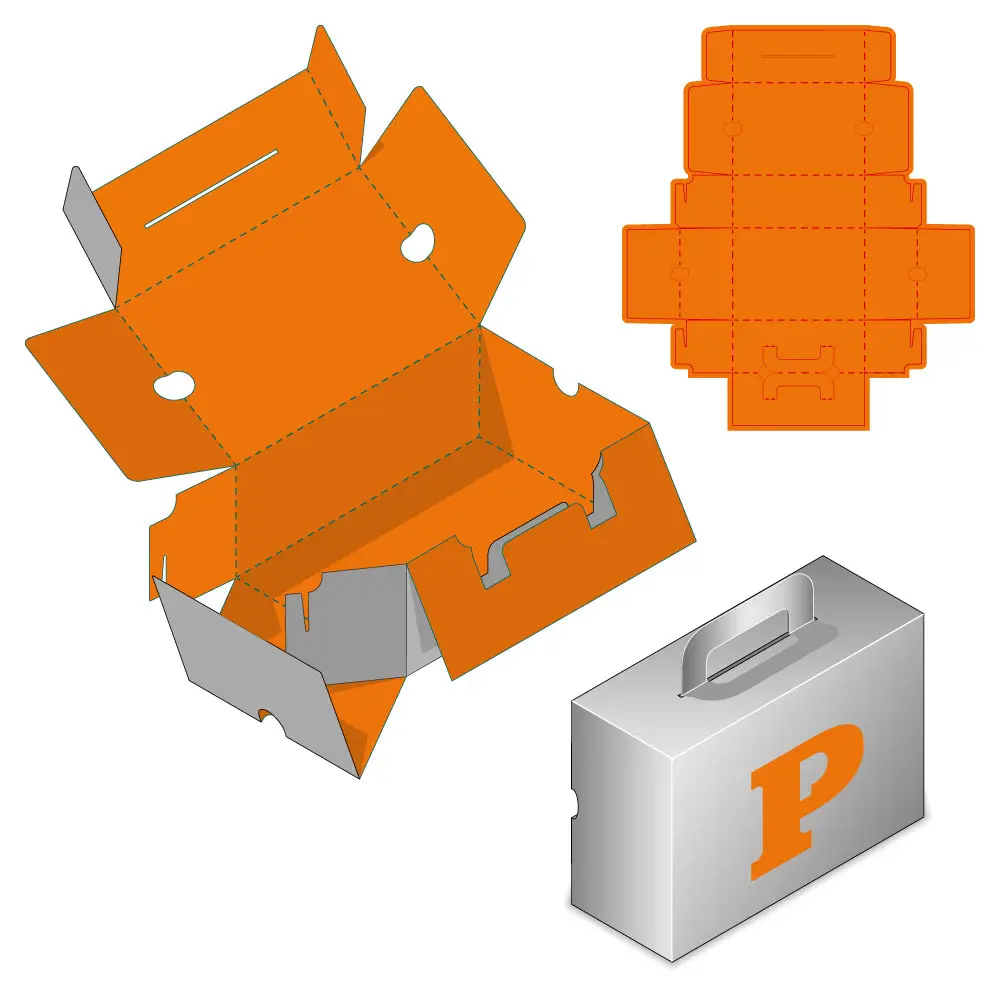
How to Create Cutting Die Files (Step-by-Step)
- Document setup: Size your art to final trim. Add 0.125″ (3 mm) bleed on all sides and keep critical content inside a safe margin.
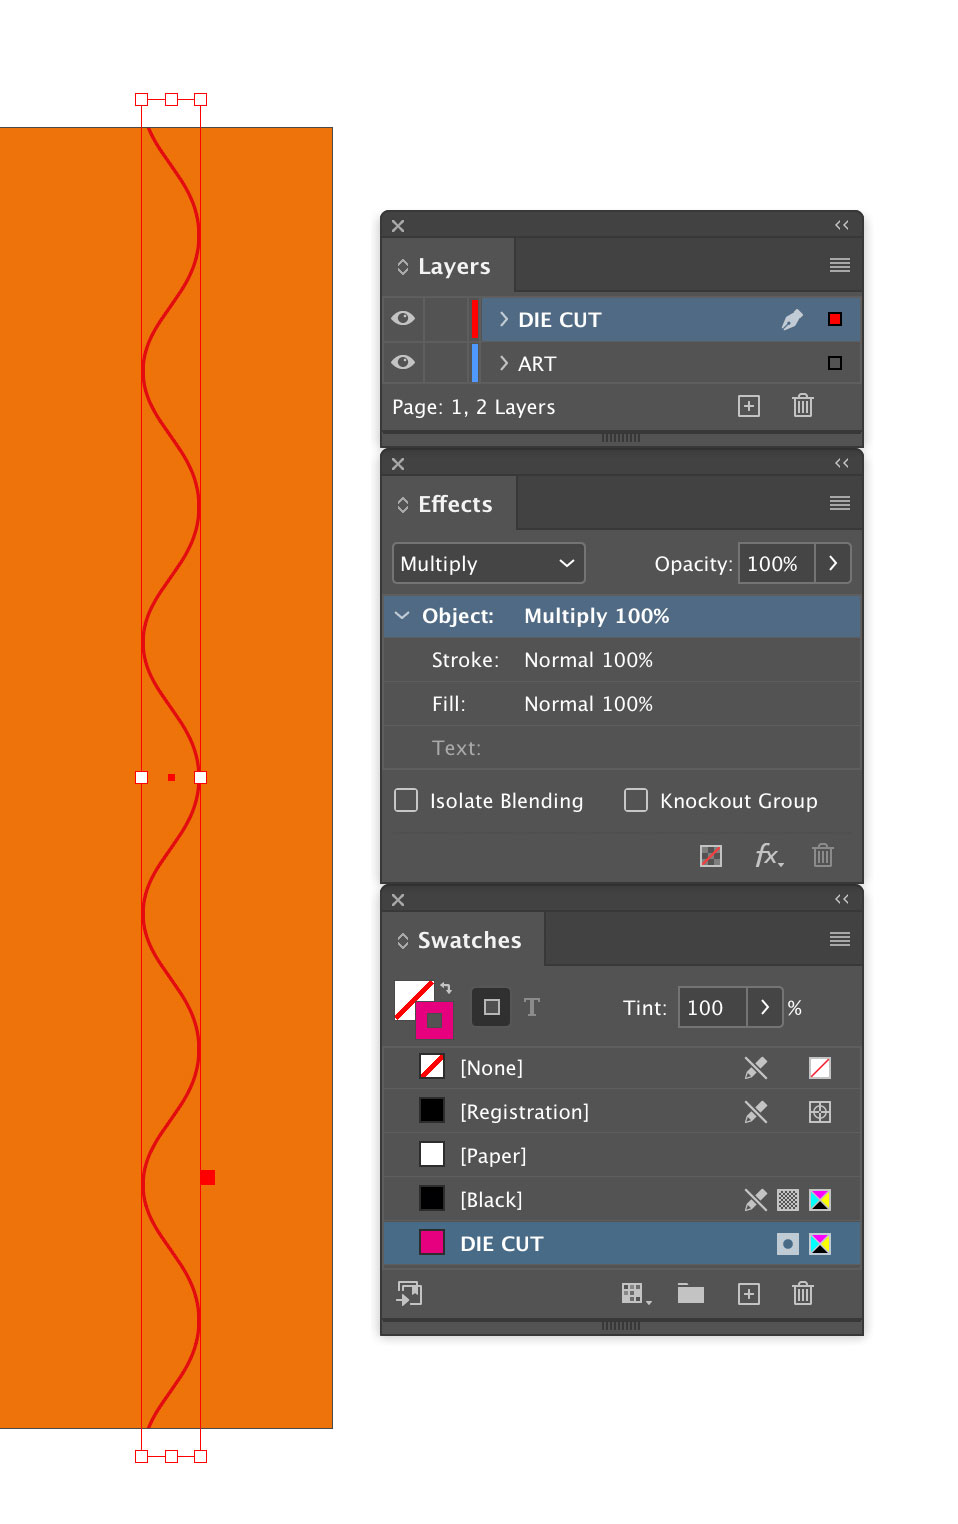
- Vector only: Build die lines as vectors (no raster edges). Convert strokes to outlines only if your finisher requests it.
- Spot colors + labels: Use distinct spot colors (e.g., Cut, Score, Perf) and name them clearly. Set die layers to Overprint so they don’t knock out artwork.
- Line conventions: Solid = cut, dotted/dashed = score or fold, dash-dot = perf. Keep line weights consistent (e.g., 0.25–0.5 pt).
- Corner strategy: Add small radii on inside corners to prevent nicks; avoid hairline “mouse bites” unless requested.
- File separation: Keep a clean “Print” layer for CMYK art and a “DIE LINE” layer on top. Lock layers as you finalize.
- Preflight: Check for duplicate paths, open paths, and overlaps. Align dielines to artwork seams and folds.
- Export: Supply a print-ready PDF with dielines set to overprint; if required, also export a separate PDF that contains only dielines.
For structural projects like packaging or boxes, ask us for a template or CAD sample to confirm fit before you invest in graphics.
How to Prepare Files for Foil Stamping
- Mask plate: On a layer named “FOIL,” create solid vector shapes where foil should appear. Use a single spot color named “FOIL” (any swatch color is fine, it’s just an indicator).
- Registration & traps: Keep micro-type and ultra-thin lines conservative. Avoid hairline registration with underlying CMYK; allow a slight choke/spread when needed.
- Textures and coverage: Large foil areas show substrate texture; smooth coatings improve laydown. Ask about paper/foil compatibility for your effect.
- Export: Deliver (1) the print file and (2) a foil mask PDF. Name clearly, e.g., Project_Print.pdf and Project_Foil.pdf.
See our foil stamping page for effect ideas (metallic, pigment, holographic) and to start a quote.
How to Prepare Files for Embossing/Debossing
- Emboss mask: On a layer named “EMBOSS,” create solid vector shapes where the paper will raise (emboss) or recess (deboss). Use a spot color named “EMBOSS.”
- Relief & detail: Keep fine details bolder and allow breathing room around tight textures. Multi-level or sculpted looks require cleaner vectors and suitable stocks.
- Alignment: If combined with print or foil, keep shapes simple and leave a small tolerance to prevent halos.
- Export: Provide separate Print and Emboss PDFs. If doing combo foil+emboss, we’ll advise whether a combination die is appropriate.
Explore options on our embossing page and ask about sculpted dies for premium elevation.
Mockups, CAD, and Proofing
Before approving dies, request a 1:1 mockup or CAD sample—especially for structures. This confirms fit, fold behavior, closure, and alignment across cuts and creases.
Materials & Paper Considerations
- Stocks: Heavier, long-fiber papers hold emboss relief better; smoother stocks often improve foil coverage.
- Coatings: Matte/soft-touch can mute small relief; gloss can emphasize edges. Foil adheres differently across coatings—check with us early.
- Tolerances: Budget 1/32″–1/16″ mechanical tolerance for complex finishing; avoid hairline alignment demands between processes.
Final Preflight Checklist
- All die indicators are vector, spot color, and on their own layers (Cut / Score / Perf / FOIL / EMBOSS).
- Bleed added; safe margins respected; no critical art crossing folds/cuts.
- No duplicate or open paths; line weights consistent; dielines set to overprint.
- Fonts outlined where required; linked images embedded or packaged.
- Exported separate PDFs when requested (Print, Die Line, Foil, Emboss).
FAQ
Do I need different files for cutting and foil/emboss?
Yes—keep each process on its own layer, and when asked, export separate PDFs. This protects registration and simplifies tooling.
Can you provide a dieline template?
Absolutely. For packaging and boxes, we’ll generate a CAD dieline so your artwork snaps to the exact structure.
What’s the fastest way to sanity-check folds?
Print a full-size mockup and use the Folding Guide to confirm panel order, orientation, and allowances.
Ready to Start?
Send your files and a short brief and we’ll review tolerances, materials, and tooling recommendations for your project. Request an estimate—our team will guide you the rest of the way.

Paper Types Explained
Discover the differences between coated, uncoated, matte, and gloss paper stocks. Learn how paper weight and finish affect the look, feel, and durability of your printed piece so you can choose the right option for brochures, books, or marketing materials.

Binding Types
From saddle stitch to perfect bound and Wire-O, each binding style creates a different look and level of durability. Explore which binding method best suits your booklet, catalog, or publication so your project is both functional and professional.

Folding Calculator
Folding layouts can be tricky — our calculator makes it easy. Quickly figure out panel sizes and fold styles like tri-fold, Z-fold, or gatefold so your design lines up correctly and prints without surprises.